I LOVE the idea of always having home made art on my walls. I mean, something hand made that was done out of inspiration from somebody I know (or admire)! :) AND hand printing is one of my MOST FAVORITE ways to make home made art myself for either my own walls or as a gift.
If you are like me and are known to change (OR WANT TO CHANGE) out the artwork on your walls often, then this is the project and technique for you! :) Hand printing is technically a version of block printing, but I think it’s faster and more immediate (my kind of project! :) It’s all about shapes and colors….and often time it’s combined with other elements, such as paper scraps, sharpie (or pen) doodles or writing, and other mixed media elements! :)
Here we go! :) Today I’m going to show you the basics of hand printing and use my print as a super-simple project in my little boy’s room (hint hint, this would be an AWESOME baby shower gift for any mommy-to-be! :)
THE MATERIALS:
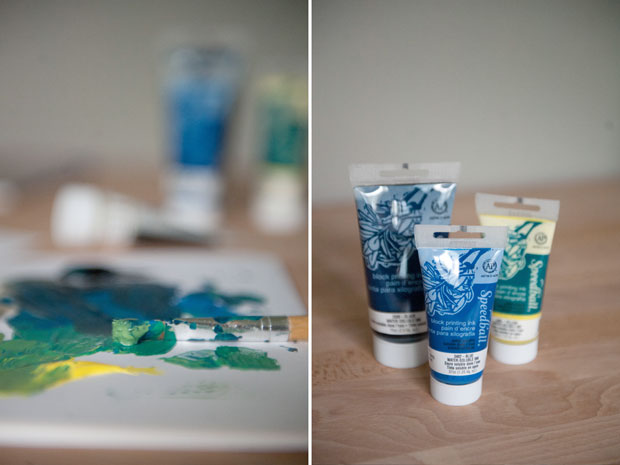
1. Ink. I use water-soluable ink (easier to clean up) and tend to love the speedball brand for printing on paper (if you plan to print on fabric, check out tfor an awesome selection). Make SURE to get some “ink extender”….it’s basically a clearish paint that extends the “life” of ink so that it doesn’t dry out fast while you’re printing AND it can make your ink a little more “spreadable” and thinner for those papers without a “tooth” to them.
2. Paper. I’m not a paper purist, so I believe that any lowly paper can be turned into amazing artwork! :) Even printer paper. You would likely be happier with something more substantial, like a card stock. Something to keep in mind is that if you are concerned about the edges of your design being “crisp” when printed, I would recommend a smoother paper. Paper with “tooth” to it (more bumps) tend to hold more ink and not have as crisp of finish to your edge design! :) The best paper out there is 100% cotton paper from many art supply shops, but be aware that it can be spendy…beautiful, but spendy! :)
**Whatever kind of paper you choose, make sure that it’s larger than your desired finished size. You will want enough room to trim down your design after your printing has dried! :)
3. Stamp. Again, I’m not a stamp purist….I believe that there are GORGEOUS shapes and textures that come from unexpected materials, such as cardboard, aluminum, or foamboard. I tend to use ILLUSTRATOR board (from your local art supply shop) because (a) it’s easy to cut with both a scissors and an exacto knife, (b) you can get a HUGE sheet for under $15 and (c) shapes big and small work great from this material. Illustrator board will tend to print quite smooth. The biggest trick when it comes to a stamp surface is to make sure that you are using something that is “thick” enough to grab from the paper itself (or you’ll have to add a handle for printing). And remember to experiment with different textures to achieve your desired results! :)
4. Paintbrush or roller (either is fine) for applying the ink to the stamp. A paintbrush will give you variation in the colors (likely) and a roller will make the color more even (especially if it’s not a mixed color).
5. A cutting mat, exacto knife and pencil (for cutting out your stamp). This is optional if you’re planning to use scissors.

THE STEPS:
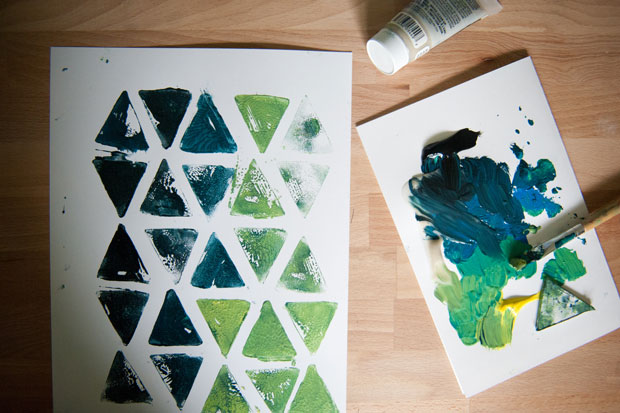
1. CUT our your stamp for your design. Even if your stamp is simple (like mine) try and find a way to add variation to it with color or a repeating pattern! :) Remember, simple can be AMAZING when done well! :) If you’re a picky designer, you can mark the “edges” of where your design will start and stop. If you’re a “lets get this done” kind of maker, like me, then just start stamping and see what happens! :)

2. INK UP your stamp! :) Apply a generous enough amount so that the shape is reflected in the first press! :) The more ink, the more “squish” you’ll get when you put the stamp down which means the less control you’ll have over the shape of your design (your edges won’t be crisp and clear). I don’t mind this. Another thing to keep in mind is that if you are applying your ink with a paint brush, you can vary the colors slightly in the stamp when painting on the ink.
3. PRESS! This may seem like a DUH step in the process, but I believe it to be the most important! :)
a. “Hover” your stamp above the area that you’re visualizing to stamp on the paper
b. In one quick motion, place the stamp directly onto the paper with GUSTO and press.
c. With the stamp in place, firmly swipe your hand across the stamp making sure to get all of the corner or edges of your design. You want to make sure that you are getting your design transferred fully to the paper. It is optional to roll over the stamp with a rolling pin! :)
d. Gently lift up one corner of the stamp from the paper to “cut contact” with the paper, remove the rest of the stamp in the same way!
e. TAA DAA! Repeat as many times as necessary! :)
And you may want to test your PRESS before you actual start on your “good paper”! Get a feel for how much ink you prefer and how hard to press with your particular material and paper. And REMEMBER that the best part about hand printing is that IT WILL NOT BE PERFECT! :)


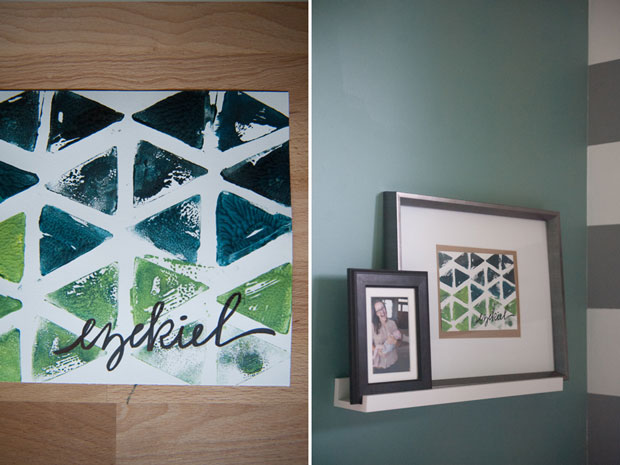
4. TRIM the paper after the print is dry! Measure your frame or area for the art piece and trim it down to size
5. Add EMBELLISHMENTS! :) My favorite part. Add fabric scraps, a hand drawn doodle, a saying in sharpie or another round (or layer) of printing! :) Make this piece your own….take your design to the next level and personalize it. Add seasonal embellishments or throw it in a frame “as is”! :)
AND ENJOY (and start planning your next art piece! :)
So what do YOU plan to make?! :) We can’t wait to see your latest hand printing project….so please share! :) And happy Monday everyone! :)
[…] Using the awesome techniques from yesterdays post, here is just a quick inspiration for making some of your own stash of hand printed cards to have lying around for those everyday moments! :) […]